Don’t have enough room in the budget to rent an arsenal of lights for your nighttime exterior shots? Try using this compositing method that only requires one light.
So, you want to light a night scene. And you want to do it right. But if you don’t have the right tools, there are so many ways for it to go wrong. In my opinion, trying to get a well-exposed image at night is a rich man’s game. An entire arsenal of lights and generators are needed to brighten up a dark forest or haunted graveyard. And if you are like me, you don’t have the money for that. The only way that indie filmmakers could shoot a quality sequence in the darkness was either by blowing their budget on gear rentals for a night, or using day-for-night color grading.
That’s not the case, though — we lit the following opening sequence with just one light using a technique we call “Lighting in Plates.” It’s a form of compositing that weaves several shots together to provide ample lighting coverage for the entire shot.
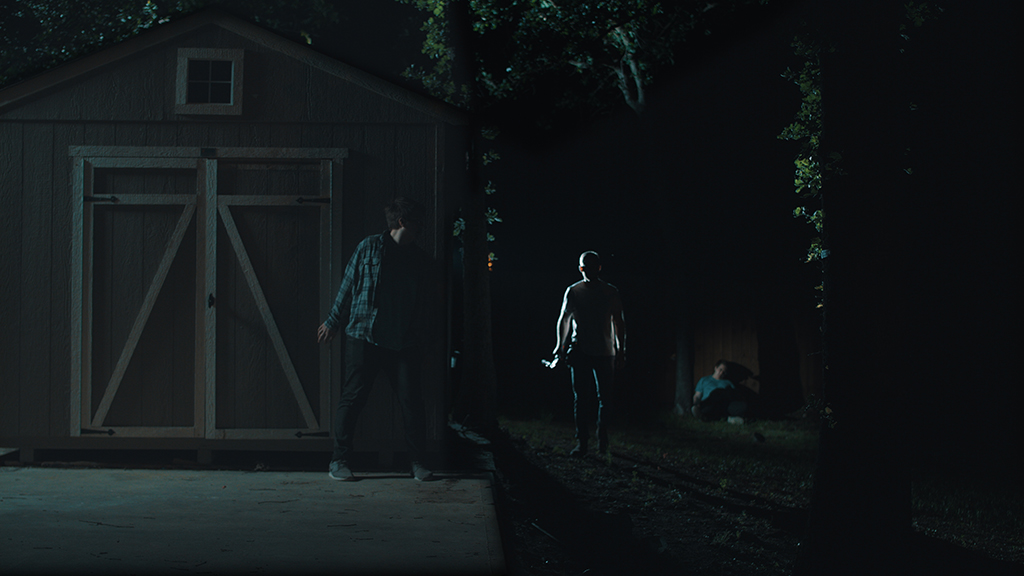
Take our wide reveal shot — it may look like a normal shot, but this is actually several shots taken in the same place that we stitched together in post. One for keying the subject, one for backlighting the killer, and the others for filling in the background, which all come together to form a fully lit scene.
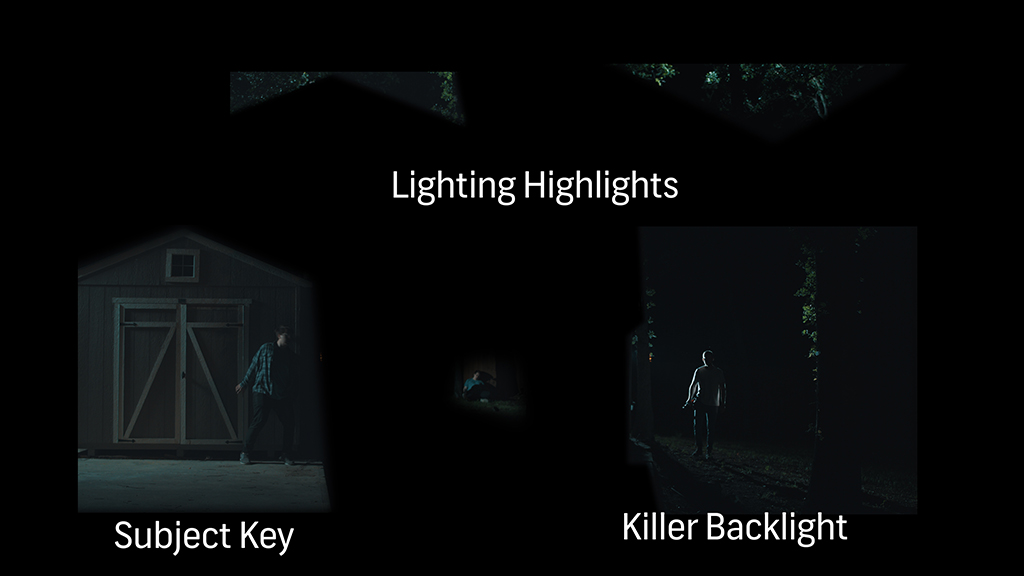
To attain all of these separate shots, we placed a camera on a tripod, capturing a wide shot of all the necessary components. Now, an extremely important thing to remember is that you CANNOT move the camera at all. For the plates to match up correctly, you have to have the exact same frame in each plate. Any movement at all from your camera, and you will have to re-shoot the whole sequence. So, we put some sandbags down next to the tripod to prevent any movement.
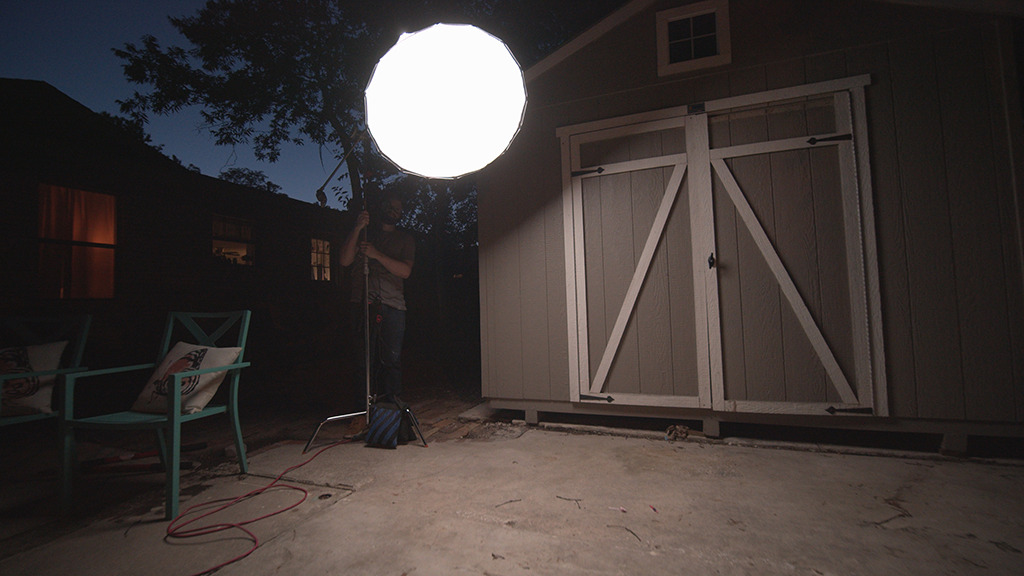
We used just one light — the Aputure 300D with a softbox attachment. It’s a super versatile light that blasts a ton of great, even light wherever you point it, and we use it constantly here in our studio. A good bonus to this light is that you can use it wirelessly by attaching a V-Mount battery to it, in case you don’t have access to a single outlet on location.
Before you start setting up your light, plan where your light is going to come from. If you want to mimic moonlight — which is a directional, one source light — the direction needs to be uniform across all plates. We decided ours was going to come from the top left of the shot, beaming down to the bottom right. (One other thing you have to look out for is visualizing what is going to be masked out for each plate.)
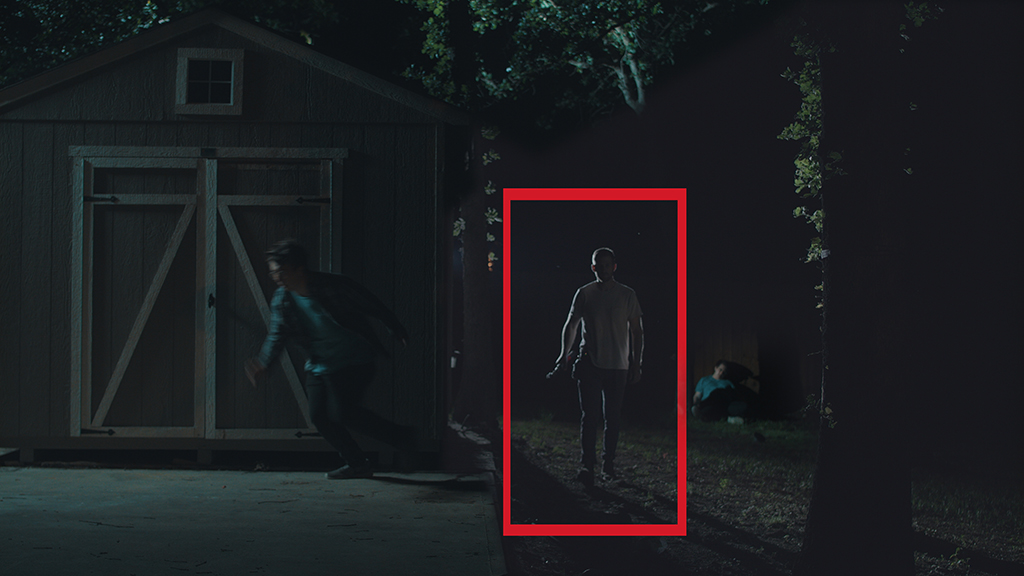
If you have any moving objects (such as a person walking), make sure they stay within their artificial boundaries, so they don’t accidentally walk out of their individual frame. If they do step out, you can still use it, you’re just going to have to rotoscope them into the other shots. When recording, get at least 30 seconds each of every plate, just so you don’t have to loop them for a long take.
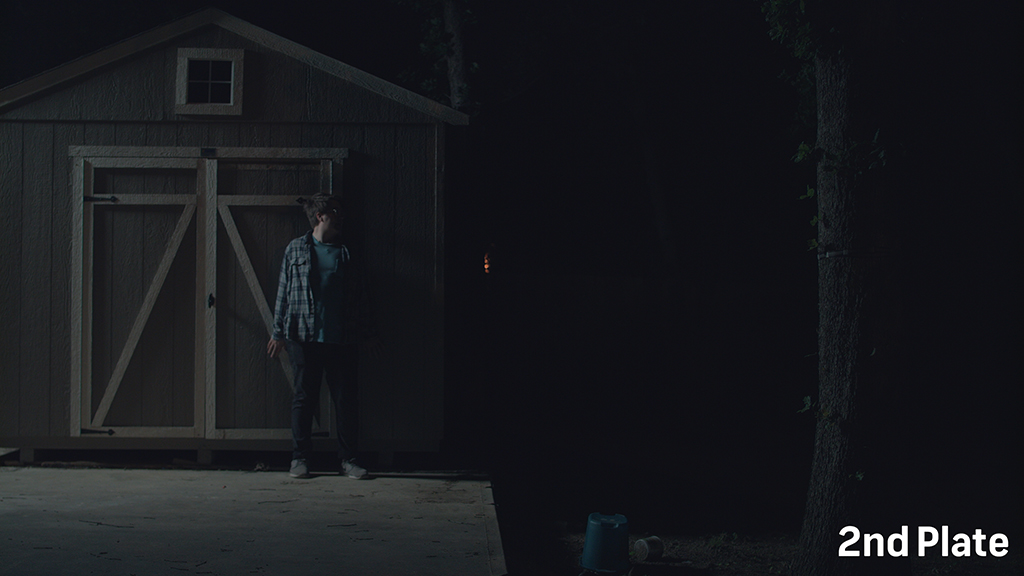
For our first plate, we recorded a blank template with the lit-up shed, just as a backup for the masking process later in post. Our second plate was the initial key light used to light both the shed and the subject. This was placed high and pointed downwards, on the left side of the shed offscreen, which created a nice soft moonlight that doesn’t use too much light.
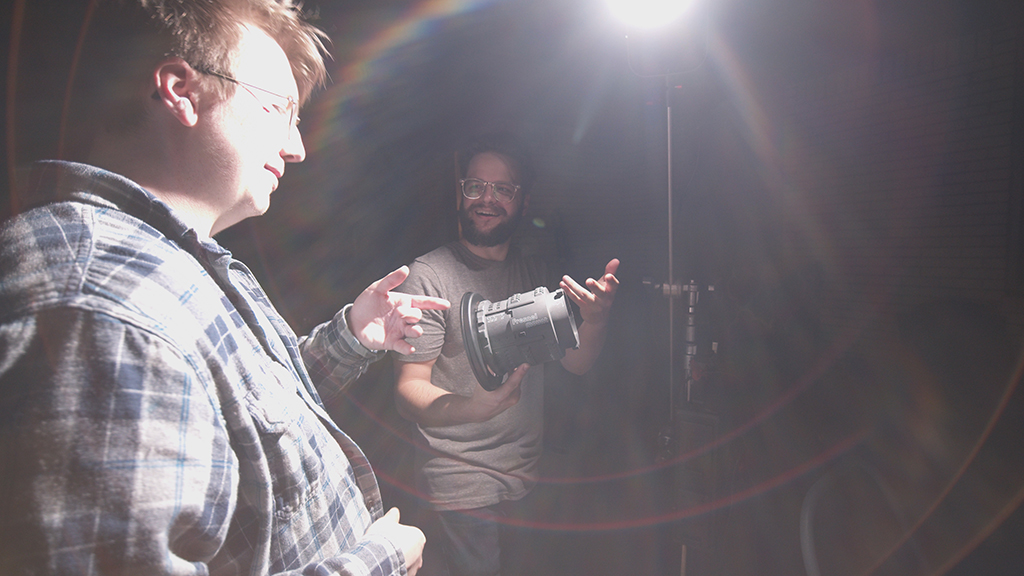
Our third plate was our killer’s spotlight. To achieve this backlit horror shot, we took the softbox off of the 300D and replaced it with an Aputure Fresnel attachment, which concentrates the light into a single beam. If you don’t have a Fresnel attachment, using the barn doors (usually attached to your light) will suffice.
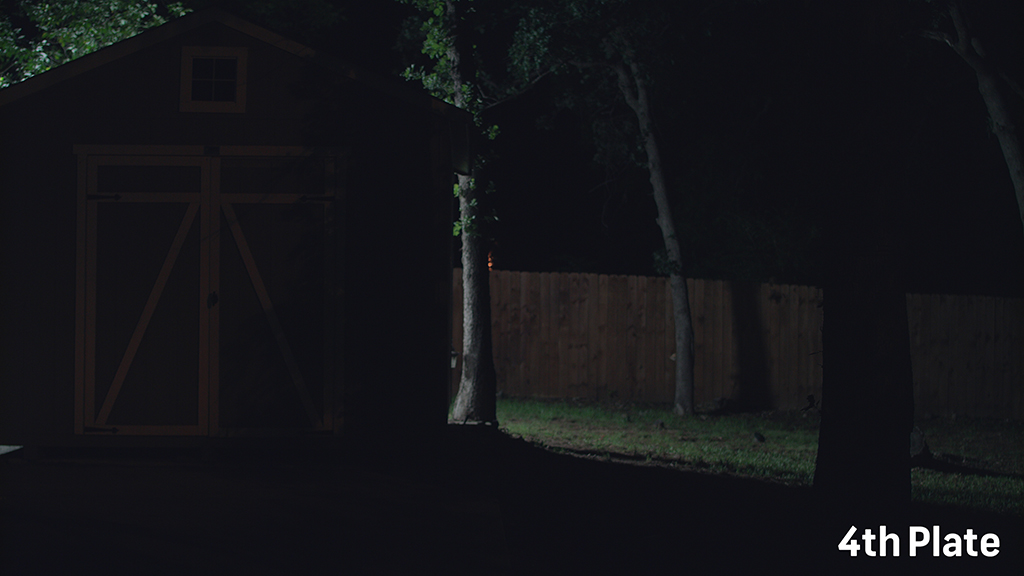
Our fourth, fifth, and sixth plates were accent lights to brighten up the rest of the frame. That includes some directional light pointed at the trees, and some fence lighting that was passed through some branches to give it some dimension. I even placed a dead body in there to fill out the scene, which, if you look closely, is actually me!
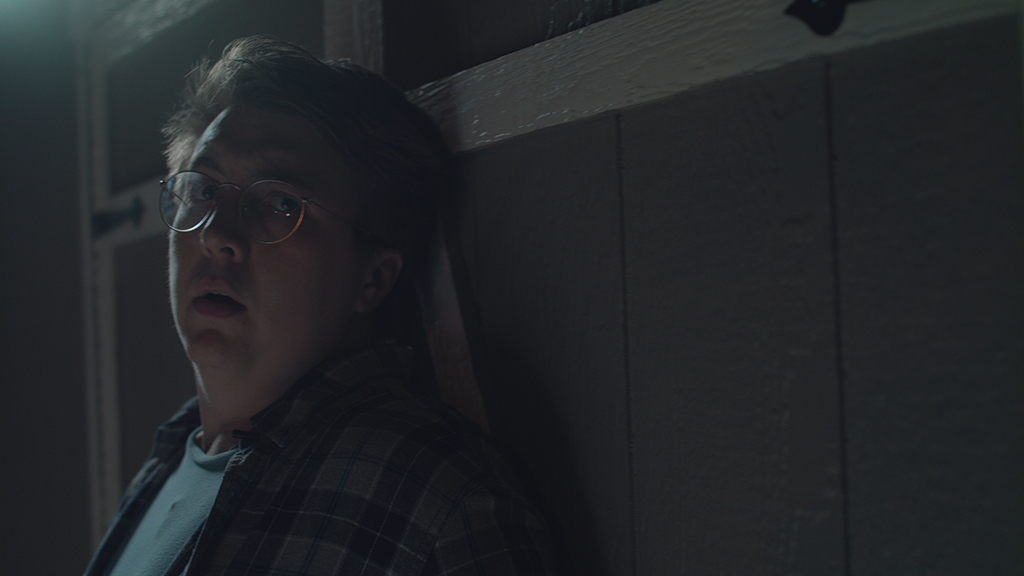
For close-ups and inserts, you can easily use just one light to create a really soft key on your subject from up high. On our handheld shot, we just raised up the softbox and pointed it down and across the subject, spilling just enough light on his face to bring out his features, without any grain.

Now, after shooting, we move on to the stitching part of lighting with plates. It’s actually a lot simpler than you might think. Bring all of those clips into Premiere. Layer them on top of each other in the timeline, in order of the largest plates on bottom and the smaller accent plates on top. Now, toggle track output on all of the clips, except your first and second one. You can leave the base, blank clip unmasked, since you will be layering other composite layers over it.
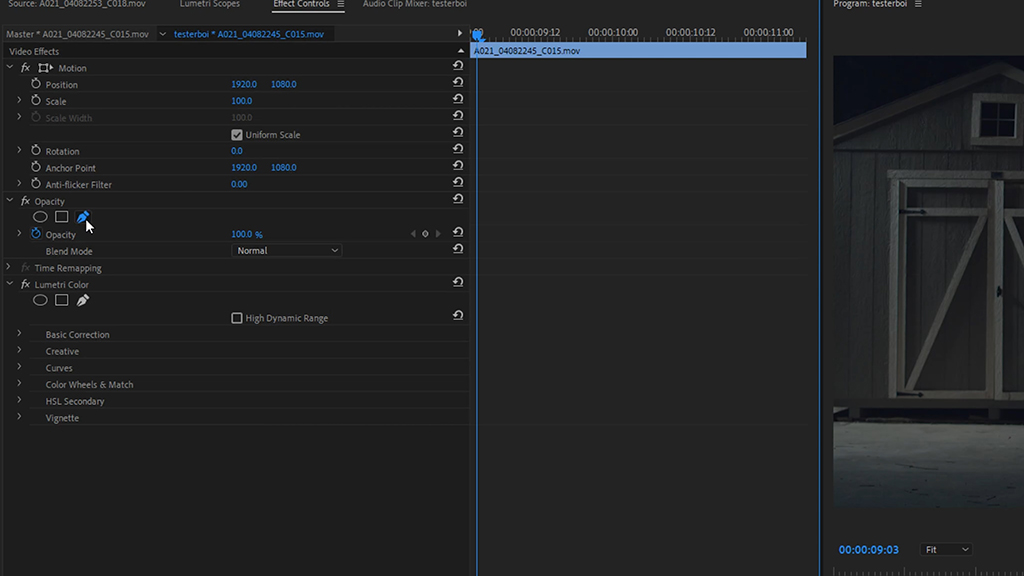
Go to the opacity settings of your second clip, and select the pen tool. Outline the parts of the clip that you would like to keep as your layer, then feather the edge so it blends in to the others.
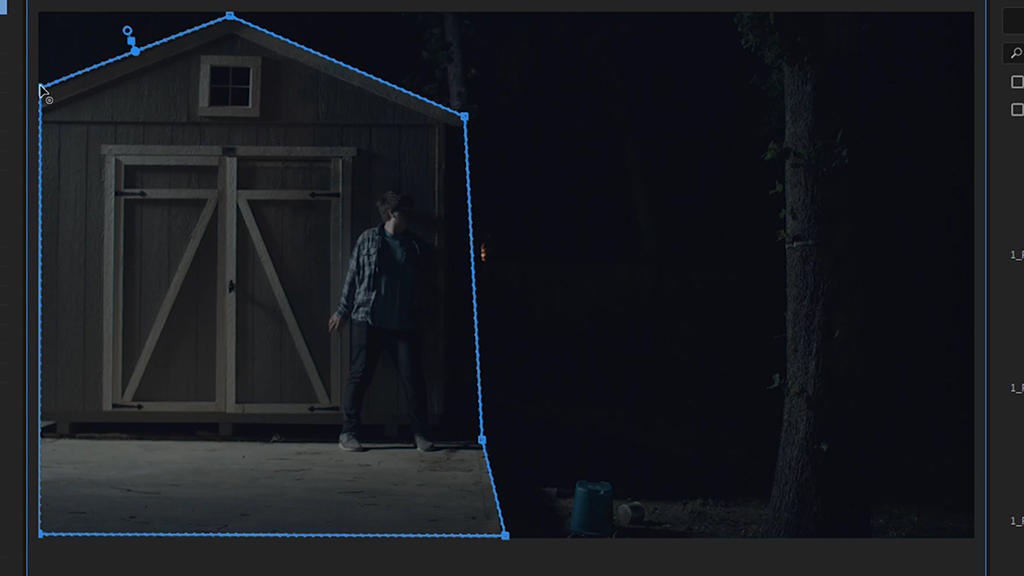
Repeat the process for each layer — taking your pen tool and only selecting what each plate needs to provide to the shot. Once you’ve got those layers assembled, now you can go into the Lumetri color settings of each clip and start to match them to the other clips. If one area is unnaturally brighter than the rest, pull down its curve and match it to the others. Now, this clip is obviously static, but if you want to add in a little crawl zoom, you can nest your clips and adjust the scale key frames from there.
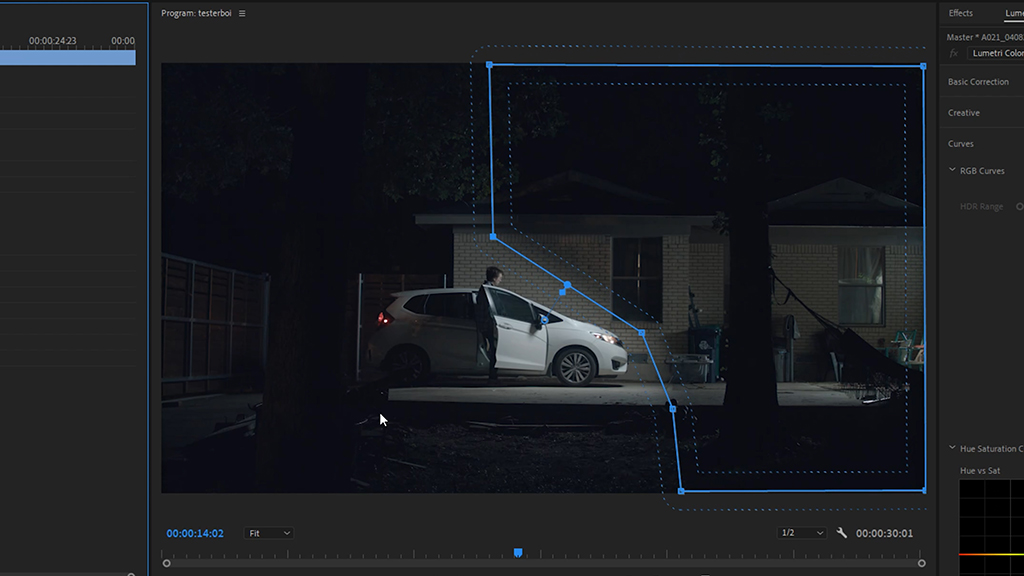
Now you’ve got a fully composited shot, comprised of six different shots! Obviously, this was a lot of work to get just one shot. A more practical use of the plate lighting technique is using it when you need an ultra-wide shot and can’t practically do it without the light in the shot. To easily mask out the light but keep the light output in there, take two shots — one with the light in the frame, and the other one with the light out of frame, but lighting up the dark area of the previous shot. Bring these into Premiere, mask out the side with the light in it, feather and color adjust from there.
Interested in the tracks we used to make this video?
- “Avatars” by Yan Perchuk
- “Sensual Touch” by Alex Beaulieu
- “Night Drive Synthwave” by Young Presidents
- “Rad” by Peter McIsaac Music
- “Beach Rabbit” by Senbei
- “Latin Girl” by Senbei
- “Brooklyn Geisha” by Julian Bell
Looking for more video production tutorials? Check these out.
- 7 Ways to Enhance Drone Shots in Post
- How to Create Dramatic Portraits with Shadow Photography
- How To Mod Your Own Lenses on The Cheap (Anamorfake)
- The Basics of Rotoscope Animation in After Effects
- 10 Types of Shots and Angles Every Filmmaker Should Know


